Wednesday, April 27, 2011

Gothic Wonderland - Digital Fantasy Scene

I've been having a bit of fun creating a fantasy scene digitally in Photoshop.  This was done using lots of layers, textures, an old church engraving, photo of clouds, an old map, some Japanese paper, a great image of a cloaked girl and some magical butterflies.  Add several hours of manipulation and this is what I came up with.

Enjoy!

Gothic Wonderland by EKDuncan 2011

This is the list of images used to create this fun scene.

I started with this old engraving of a Church Bay.
The windows were made to be transparent and I saved it as a 
png so the windows would remain so.

I duplicated the png twice more to create the side panels.
I used the Edit - Transform - Perspective function in Photoshop
to give the side panels the visual effect of becoming a real room, 
then used Edit -Free Transform to widen those walls out.


This map of England became the sky of the room
I wanted my room to have a unique ceiling and thought it would be fun 
if it was more like the old ruins that are open to the sky; however 
I wanted to have more going on than just clouds in the air 
so I used this map of England to be my "sky".


I used this funky Asian pattern to create my tiled floor
This Asian patter looked like an intricate floor tiles to me,
so I used it as the base of my Gothic Flooring

Edit - Transform - Perspective  and then 
Edit - Free Transform
was used to shape 
both ceiling and floor.

I used the following Textures to give more interest to the project.
multiple texture layers were used on most surfaces.
Also a variety of opacity and blending mode settings were used in
Photoshop to arrive at the final results.

 I used this brown texture on the floor
(web find from a long ago - sorry, source unknown)


This Bluish Frost on Glass texture was used on the Floor
and for the Sky/Ceiling
(web find from a long ago - sorry, source unknown)


 This Gray Brown texture was used
on the walls and for the Sky/Ceiling
and also on the bench
(web find from a long ago - sorry, source unknown)


 This sky texture from webtreats was used behind the windows


This aged book paper from emptycanteen at deviantArt.com
was used to age the bench behind the girl along with the
the gray brown texture listed above.
(I've posted the image here, but it looks as though that dA account is no longer active)


Glitter 01 from ASStock at deviantArt.com
was used over the butterflies to give them extra "pop"


 The Girl and Bench came from SBG-Crewstock at deviantArt.com


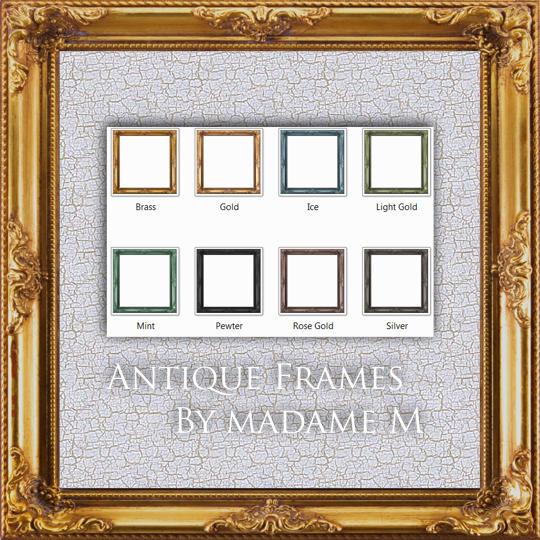
The dark pewter frame from Madam M
Antique Frame Pack 1 at deviantArt.com
was used to finish off my piece


 The butterflies came from PaperWhimsy's

Hybrid Elements  - Star 02 png set


Many thanks to all those who post textures and elements on the web for us to play with,
their just so much fun!!!


 Grins and Giggles,
 Evelyn

Thursday, April 14, 2011

Cigar Box Project with Poppy Stamp by 100 Proof Press

I love a good challenge and could not resist the opportunity to take part in the recent design contest put forward by 100 Proof Press stamps on The Handmade Gift Guide.com website.  The challenge was for 10 selected participants to use a specific "Poppy" stamp by 100 Proof Press to create an original entry.


I received my rubber stamp earlier this week and have finally put my project together.

I choose to create a decorated cigar box using portions 
of the 100 Proof Press "Poppy" stamp.


This is a side view of my finished cigar box project.


 Top View of the finished "Poppy" box.


View of the box with the lid open.
 I wanted the cigar box to remain a recognizable cigar box so I 
left the interior undecorated, just for the grins and giggles of it.


 I had a lot of fun creating this project and love creative process of thinking outside of the box on challenges like this stamp contest.  There is just something so fun about being given one image and having to push your boundaries to come up with something unique.   I love the way this project came out and look forward to using this storage box as a trinket chest.


So for those of you who like to know how I did it...

I thought this little square cigar box would make a great base to showcase the 
100 Proof Press "Poppy" Stamp.  I liked yellow background, the gold edging and thought the flowers would be the perfect decoration without totally obscuring the basic appearance of the box.
It took a bit of time to carefully remove the extra labels off the box but it cleaned up nicely.

Once I knew I wanted to decorate a cigar box a la decoupage style , it was a question of how to execute it properly.  Decoupage requires thin paper that will be able to withstand a wet glue like medium to apply the images as well as to brush on several layers of the stuff to seal it all on an allow the box to be fairly durable to handling down the line. 

I wanted a watercolor effect but knew that if I used watercolors or pastels I would have a huge problem with my colors running when I went to apply the wet medium over the finished project so...
I chose my laser printer as the best way to color the paper and then I stamped the image on that.
(Laser printers use a heat bonding process to get the ink to stay on the paper and I knew this would be able to take on the layers of glue necessary without causing my coloring agent to bleed all over the place.)

 I scanned the image into my computer just so I could make sure I printed 
shaded color into the areas I would then be stamping over.

(Please note - I did not digitally color and print the image.  I only produced a 
shaded colored paper that I then physically stamped the image onto.)


 This is what my color shading looked like when it was ready to print.


 This project was going to require a lot of images so I printed
2 sheets of colorized shading with 9 on each sheet.


 Next I stamped the Poppy image onto a plastic viewer 
using a Stamp-a-ma-jig tool and Staz-On ink.
  

This will allow me to line up where to stamp on the colorized sheets
so my stamped image hits it just right.


 I line up the plastic viewer over the colorized area, put
the Stamp-a-ma-jig in place and then remove the plastic viewer to
stamp my image using Staz-On black ink.

As you can see from this shot I've stamped the bottom 2 rows 
already and the top row just shows the colorizing still waiting
to have the image stamped over it.


 Several hours were spent cutting out all the parts I would be using in my project.   
I started arranging a pattern I liked and then used a brush with 
paper adhesive to put my decorated box together.  
The big trick was to cover up all the wording on the exterior of the box yet still 
keep the background and trim visible.


 Once all the flowers and leaves were glued down I applied several coats of 
Gloss - Lustre Mod Podge over the top and sides of the box.
I then applied these great metal feet from Tim Holt's idea-ology
line to make the perfect trinket box.


 So this is the fun way I chose to portray the "Poppy" stamp for this challenge.
Many thanks to 100 Proof Press for sponsoring the contest and to 
The Handmade Gift Guide for hosting the contest on their site.


Thanks for dropping by
and viewing my latest creative adventure.

Till next time...


 Grins and Giggles,
 Evelyn

Monday, April 11, 2011

Flowers in Her Hair - A Fun Digital Art Creation

I was re-flipping back through the Autumn 2010 issues of Somerset Digital Studio the other day and really enjoyed looking at the images that showed digitally created hairdos with flower images.  It just looked like a fun thing to do so I thought I'd give it a try and see what I could come up with.  

I'm still new at creating digitally with Photoshop and found this attempt quite a challenge.  It's not bad for a first attempt but I know I have a long way to go for achieving the look I truly was going for.
FYI - Helmet Head wasn't really what I had in mind.

We don't always achieve happy result when we attempt new things; so even though she's not all I wish she could have been, I wanted to post her anyway to encourage others to make that first attempt. We all have to start somewhere and should embrace our creative attempts - flaws and all - this is how we learn and grow.


I kept adding layer after layer of flowers on my image, till she was covered in a cap of roses and buds.  Then I added several more fun images till I created this "Flowered Astrologer".
Most of the images I used to create this scene came from PaperWhimsy.

 
I started with this lovely lady as my base.  I removed the background and part of her funky hair, then I colorized her and turned her into a png file so the background area would remain transparent.
(see my previous post Pretty in Pink to see my Photoshop tutorial on colorizing images.)

 
I used this great curtain image by PaperWhimsy around my lady.


 I used these PaperWhimsy Stars to for some extra fun in the background.


I used this texture-10 by PaperWhimsy as my background 
and for extra color on my gold frame. 
For my frame I added this as a clipping mask layer and set the color mode to 
Color Burn- Opacity 93% - Fill 60%
This pulled a bit of the turquoise color into the gold frame to tie everything together.


I used these roses Botanique 05 as a group and individually in her hair.


 I used these blossoms Botanique 06 individually throughout her hair.


 I used this Zodiac chart as part of my background. 


This is the gold frame I used to finish off my piece.
Frame is by Madam M at deviantART.com
Click HERE for her collection of  antique frames.


Put it all together and this was my finished project.


Here is another version of her
This was an alternate version where I kept her wild hairstyle 
and only gave her a partial crown of flowers.

 I'm not sure which I like best so I thought I'd show both versions for the fun of it.

I think I was having issues with the wild hair and probably needed a larger assortment of flowers and other items to create a fanciful floral hair replacement artsy look I've seen other artists achieve.  I hope to one day revisit this post so I can show you an updated attempt, once I hone my skills a bit more.


Till next time...


Grins and Giggles,
 Evelyn

Sunday, April 3, 2011

5 Victorian Ladies - Mini Pink Cabinet Card Photographs

Years ago my Father-in-Law purchased a box of old letters at an auction and among those pieces of paper history were these amazing narrow cabinet card photos of 5 Victorian Ladies and a letter telling about them.  The odd sizes of these photos and the fact that one of them has a back and front picture has always fascinated me; so I thought I'd blog about this fun find and share what I know of their story.


 This is the first photograph that was included with the letter.
I love the fact that it is a front and back shot of these 5 Friends from the turn of the 20th Century.


 This was the second photograph included with the letter.
These ladies are in "Fancy Dress" as men.
These kind of novelty photos are just such a treasure to find and it amazes me that it ended up in an auction box of stuff; but I'm glad it did since I was privileged to study and scan them because of it.


This is the original envelope and letter that the photos were in.
It's dated from 1949 going from one relative in East Cleveland OH to the daughter of one of photographed ladies who lived in West Cleveland OH at the time it was mailed and received.
(This was part of a parcel of letters that were auctioned off close to Raleigh NC about 10 years ago.)
 The letter gives the names of the ladies in the photos, except for the one that is Alice's mother.
If I'm lucky one day I might know here name as well; but for now I think it is wonderful that I know anything whatsoever about these photos.
This back-up documentation just adds so much to this fabulous find.


Here is what I now about the photos

The best I can tell from the handwriting - the 5 Ladies were friends and two were cousins.
 They are Margaret Roop, Alice Keil's Mother, Daisy Deal, Ella Malcolm and Ida Stewart.
(who is the cousin to Alice and Wilson Reed Stewart the man who mailed the letter to Alice.)

All the Photographs are attached to a very pale pink photographers board like Cabinet Card Photos of the same time period; except these photos are much narrower.  They measure approx. 4.25 x 1.50 inches.
It's almost if if a standard Cabinet Card board was cut into slivers so that multiple narrow photos could be created from the one board.  

The pink backing board does have professionally rounded corners and had originally been gilded in gold.
(due to age the pink color of the board has faded as has the gold edging but the evidence is still visible.)
Pink photo boards came out in the late 1870's and though not one of the most popular colors they did continue to be used to the early 1900's.  

I know depending on the size of the backing board, photographs from this age have different names but I've yet to discover the correct term for this size of board backed photograph.  ( If you know what it is called or where I can find more info about this size of board backed photographs, please leave me a note in the comments section of this post.  I'd love to know more about these.)


What I speculate about the photos

My hubby made a comment about the "In Drag" photo and how it had that touristy/campy look like the old-tyme photography shops you see in resort areas.  This got me to thinking that since the letter was from the Cleveland OH area and the daughter of one of the ladies as well as the relative that had these pictures were living in the same town; that it is very possible the photo had been taken in that area as well.  I remember a very dear older friend that lived in the Sandusky OH area in the 1920's telling me about a resort area that was the place to be back in the day.

Euclid Beach Park opened it's doors for business in 1895 on the shores of Lake Erie just northwest of Cleveland OH and it was patterned after Coney Island. 
Chances are good that there was a photographers studio that would take fun pictures of this nature.  It's all a guess on my part but I believe the scenario is a good one for how these odd sized pictures came about; considering these ladies were dressed as men in one of the shots, which meant they probably did it for a lark.

My best estimate at the age of these photos would be somewhere in the mid 1890's;
due to hairstyles, collars and sleeve styles of the ladies blouses.  
I located a Cabinet Card Photo with a confirmed date of 1894 at Phototree.com that resembles one of my ladies quite closely.

Phototree.com show this photo as having a confirmed date of 1894
The hairstyle, sleeves and ruffled neckline from the above photo are very similar 
to Daisy Deal's blouse in the center of the below photograph.

Front View of the First Photograph.
 I have to say these ladies are dressed in the late Victorian style
of the later 1880's to mid 1890's and most likely the mid 1890's.
(Please, any of you fashion historians out there let me know if you can positively give an exact date.)

The Reverse Back View of the above Photograph.
It's great to see the back of the hairstyles and the pins and combs they used to put there hair up.
 I have long hair and use these same old fashion style "fork combs" to keep my up-dos in place.
Sometimes the old ways are the best ways.

This is also the best shot to show the pink color of the backer board the photos are on, since the fronts of the boards have faded so much over time.


This is the Second Photo of the Ladies in Drag.
Too fun for words!


 Here is a listing of the products I used to add some extra fun 
in documenting these photos and letter.


The Background paper I used came from ScrapGirls.com
"Time Traveler Biggie Collection"
Time Traveler Biggie Collection from ScrapGirls.com
 I used the paper you see behind all the gadgets at the bottom right hand side of the this pack for the background to the photos and letter.


The fun Dolls I used to accent my pages came from Cemerony at her Etsy shop.
Fun Doll set from Ceremony at Etsy
Click HERE for link to Cemerony's blog showing these dolls.
Click HERE to view Cemerony's Etsy Shop


Many thanks to Cemerony and ScrapGirls for creating great products
that make my crafting experience more fun!


Thanks for dropping by.
I hope you enjoyed seeing these Victorian Photos as much as I have.

As always, till next time...


Grins and Giggles,
  Evelyn